Many of you would have recently downloaded and installed the Windows 8 Developer Preview over the past week or two. While deploying from the source files using MDT is straightforward enough, I thought some of you might benefit from being able to build from the source files, and capture a WIM, allowing further customisation and deployment options.
After some playing around, we have successfully been able to utilise the Microsoft Deployment Toolkit 2012 to build and capture Windows 8.
To start with, you will need to grab a copy of the Windows 8 source installation files from here: http://msdn.microsoft.com/en-us/windows/apps/br229516 If you haven’t already, you will also need to download a copy of MDT 2012 Beta 1 from here: http://go.microsoft.com/fwlink/?LinkId=217606
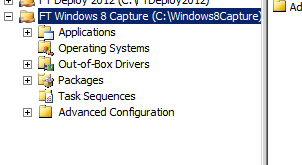
Just as with any normal MDT Deployment, we will first need to create a Deployment Share. For this lab, I have created one called ‘FT Windows 8 Capture’.
From what I have tested, our standard Windows 7 deployment CustomSettings.ini has not needed any changes made to it whatsoever. All UI prompts are skipped, and we are capturing an image.

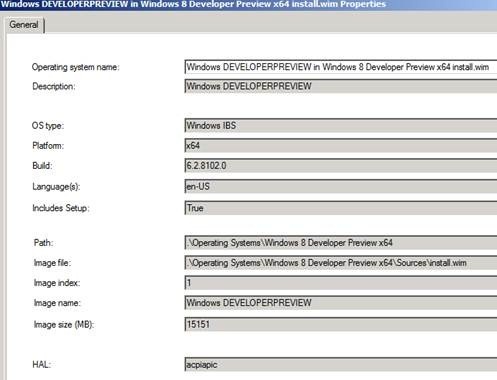
The Windows 8 source files then need to be imported to the Deployment Share. These source files will be used to install Windows 8 to our reference machine.
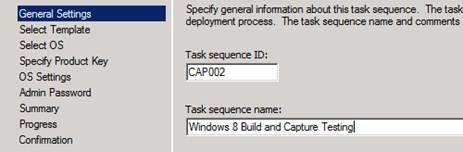
Finally, a Windows 8 Build and Capture task sequence is needed. For this lab, I have just used a Standard Client Task Sequence. Neither a product key nor an administrator password is specified at this time.
So far, it’s pretty standard. But this is where I hit the wall. The lab PC would boot from PXE, run through the various stages of pre-install, and right after formatting it would bomb out. The error message given was: "Windows cannot read the <ProductKey> setting from the unattend answer file."
The first modification required to get the Windows 8 Deployment rolling is to enter the Windows 8 Developer Preview product key in the unattend.xml file.
To do this, navigate through the deployment share you have created and into the ‘Control’ directory. From there, open the directory with the same name as the task sequence you created earlier. Open unattend.xml in notepad and find the following field (lines 34-39) -
<UserData>
<AcceptEula>true</AcceptEula>
<ProductKey>
<Key></Key>
</ProductKey>
</UserData>
Enter the Windows 8 Developer Preview key: 6RH4V-HNTWC-JQKG8-RFR3R-36498 to the <Key></Key> like so –
<UserData>
<AcceptEula>true</AcceptEula>
<ProductKey>
<Key>H9VCT-63NFW-FWHDR-F4J43-972K8</Key>
</ProductKey>
</UserData>
We will also need to delete the following component from the unattend.xml, as Internet Explorer is seemingly handled differently in Windows 8. This component should start at line 115.
<component name="Microsoft-Windows-IE-InternetExplorer" processorArchitecture="amd64" publicKeyToken="31bf3856ad364e35" language="neutral" versionScope="nonSxS" xmlns:wcm="http://schemas.microsoft.com/WMIConfig/2002/State" xmlns:xsi="http://www.w3.org/2001/XMLSchema-instance">
<FavoritesList>
<FavoriteItem wcm:action="modify">
<FavID>Favorite1</FavID>
</FavoriteItem>
</FavoritesList>
</component>
Next we must navigate to the ‘Scripts’ directory in the deployment share.
Note: I must stress that the changes we are about to make may break this deployment share for anything other than Windows 8, so *make sure* you are doing this in a cordoned off test environment!
The scripts used by MDT have built-in conditional testing to ensure that Windows XP PC’s and Windows 7 PC’s can be built correctly, even though the two operating systems are completely different. While this is all well and good, there is no scope in these tests to account for the change in version number when moving to Windows 8 (6.2).
To ensure the changes we make are easily revertible, I’m just going to show you which lines to comment out –
The following lines must be commented out of LTIApply.wsf (lines 176-178 inclusive, and lines 688-693 inclusive)
TestAndFail not oBootDrive is nothing, 5609, "Boot Drive was not found, required? "
sBootDrive = oBootDrive.Drive
oLogging.CreateEntry "Ready to Prepare boot partition: " & oBootDrive.Drive, LogTypeInfo
and
If ucase(sVersion) = "nt52" then
oFileHandling.RemoveFolder oEnvironment.Item("DestinationLogicalDrive") & "Boot"
oFileHandling.DeleteFileEx oEnvironment.Item("DestinationLogicalDrive") & "BootMgr", false
ElseIf Left(oEnvironment.Item("ImageBuild"),3) = "6.1" Then
The following line must be added to LTIApply.wsf at Line 179
sBootDrive="e:"
The following lines must be commented out of ZTIGather.wsf (lines 318-334 inclusive).
If Left(sOSCurrentVersion, 3) = "6.1" Then
If bIsServerOS then
sOSVersion = "2008R2"
Else
sOSVersion = "Win7Client"
End if
ElseIf Left(sOSCurrentVersion, 3) = "6.0" Then
If bIsServerOS then
sOSVersion = "2008"
Else
sOSVersion = "Vista"
End if
Else
oLogging.CreateEntry "WARNING - Unknown operating system build number " & sCurrentBuildNumber & " found.", LogTypeWarning
GetOSVersion = Failure
Exit Function
End if
And replace it with:
sOSVersion = "Win7Client"
As you can see, ZTIGather.wsf was poised to throw up the error “Warning – Unknown operating system build number...”
You can also see we are getting Windows 8 to identify as a Windows 7 Client for image capture purposes.
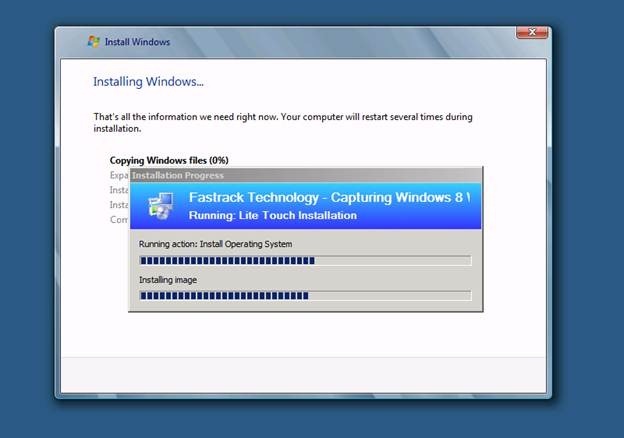
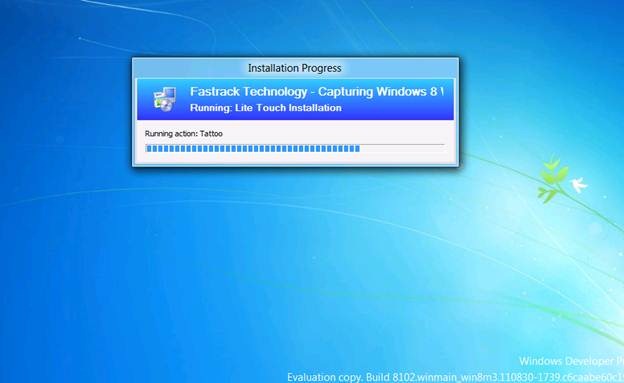
We can now kick off the build and capture task sequence.
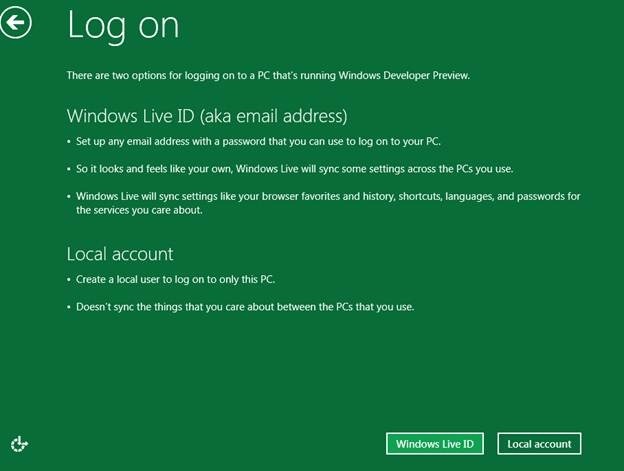
When Windows 8 boots, be sure to select ‘Local Account’. This will allow the task sequence to continue correctly.
The Task Sequence process will continue…
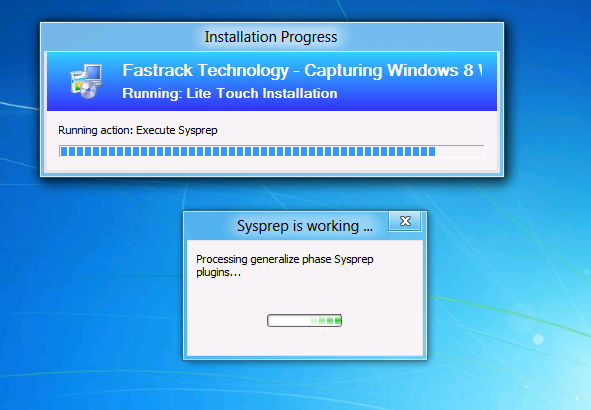
Sysprep.
And finally, after a reboot, capturing the WIM.
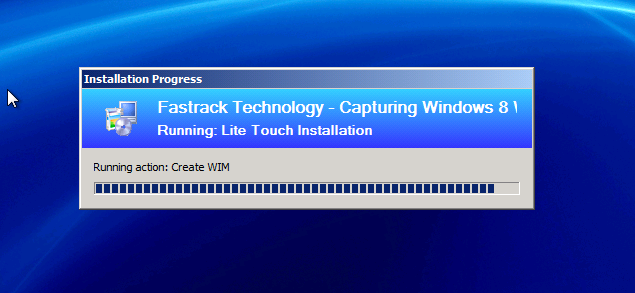
So there it is. You should now have a sysprepped Windows 8 WIM that you can use for a custom deployment using MDT or SCCM.
I hope you found this guide helpful ![]()
Adrian.